Showing posts with label house. Show all posts

Tuesday, July 24, 2012

one year later: part 1 - downstairs

Ok, it's really hard to believe that we've been in the house for a year as of today.*  This also means that it's been approximately 15 months since I've held a paying job.  Both facts are odd in a way but good too.

I haven't been that great at posting our progress on the house.  So I'm going to try to just keep this quick and dirty.  When we moved in and what it looks like now.

Outside front THEN:


Ok... and actually the front of the house looks nearly identical except that my car goes in the garage and it's Will's that sits in the driveway.  And I redid the house numbers but actually, I'm not going to show you a close up of that.  I've been toying with 2 ideas though: 1. paint the garage door green to match the front door which you can't see and 2. spray paint the light fixtures black.

oh, here's a picture of the front door.

Backyard THEN:


I actually don't have any pictures of the deck pre-"awesome craigslist teak deck furniture" since we went out to Golden to get it the day after we moved in.  We haven't done much out here either though we need to repaint/stain/take your pick the deck badly.

Kitchen THEN: 


Ah, the kitchen... It needs so much work that it hasn't even gotten touched yet.

Kitchen NOW:


We've done basically nothing. And there's so much that I want to do.

Living room THEN:


Living room NOW:


Obviously better with furniture and sans gross country curtains and wood trim (not that you can see much in this picture.  Take a look at the window sills).  There are only a few things that we know we need here: mantle, a picture over the TV (it arrived yesterday!), a slipcover for the chair in the corner, and Roman shades and wood blinds for the windows (shades have been in the works since September but they're out of my hands so.... we'll see when we get them).

Guest Room THEN:


Guest Room NOW:


I have a few plans.  I'm going to paint the walls to match the bathroom below, maybe a headboard, maybe a window treatment, and a few accessories.  Well, and finish my gallery wall.

Downstairs Bathroom THEN:

Downstairs Bathroom NOW:


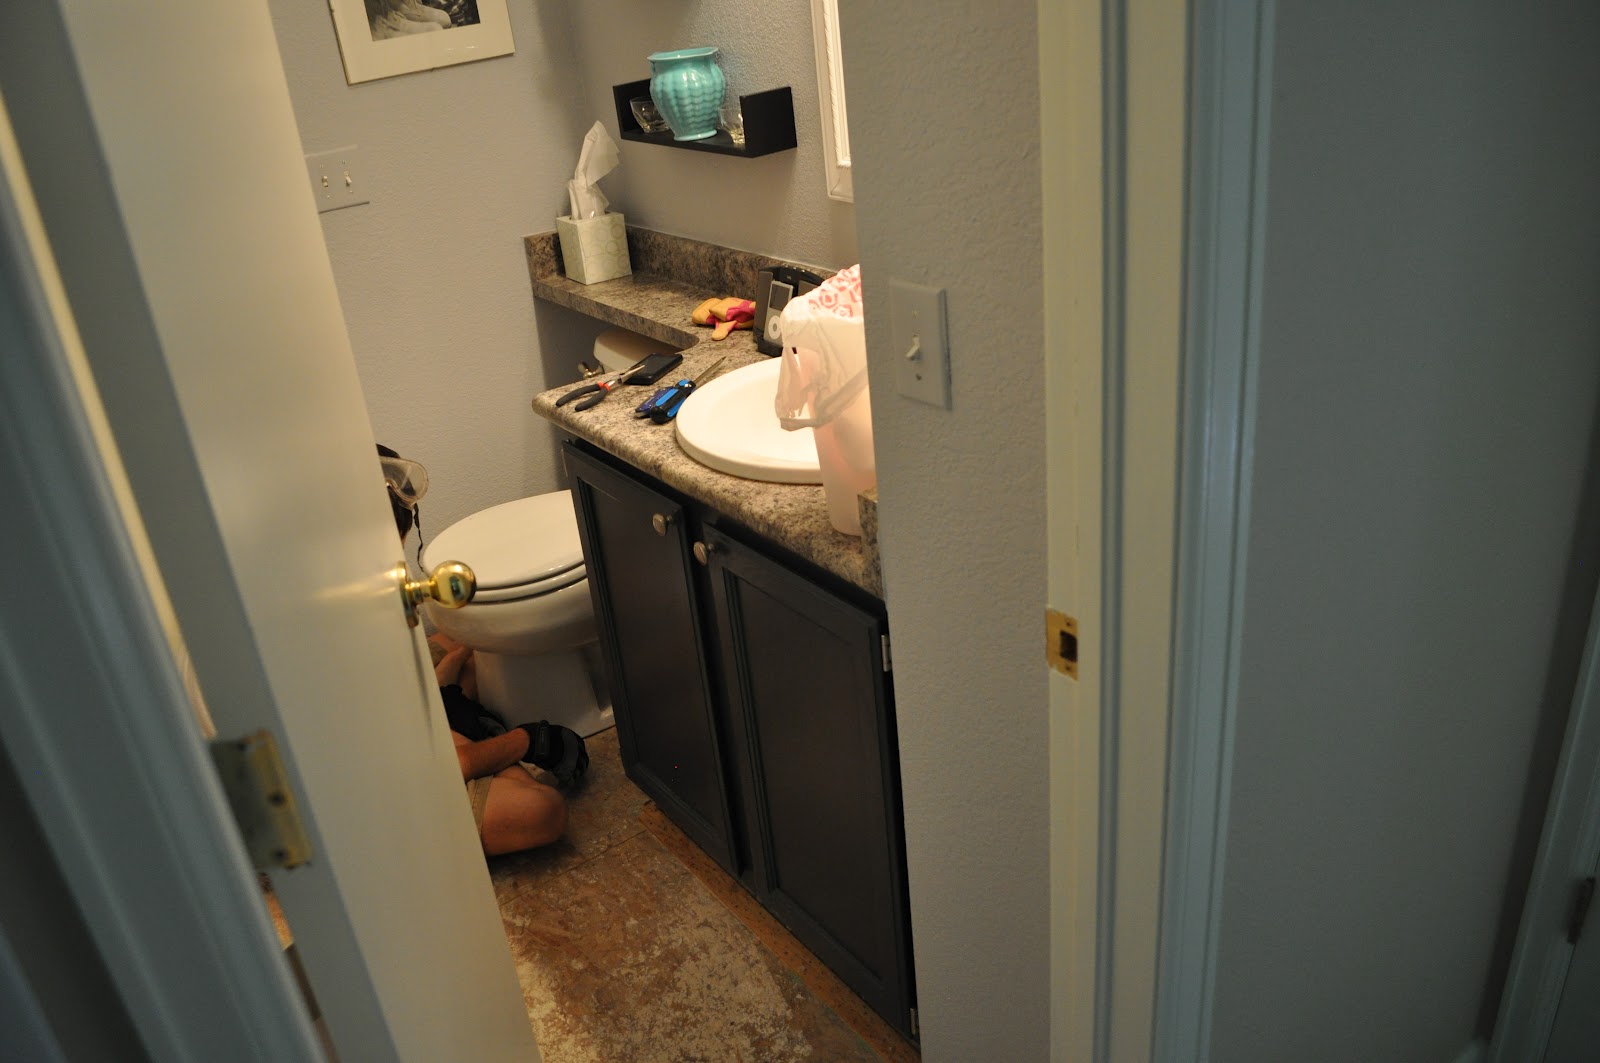
This is one of the more completed rooms in the house.  Mostly achieved through paint and accessories.  We finished laying the floor this weekend and then it's just touching up the baseboard paint (it's amazing how much baseboard that nasty carpet covered) and adding some quarter round.

Dining Room THEN:


Dining Room NOW: 


There's not too much more I want to do here.  Wood blinds.  Crown molding.  Maybe wood floors to match the kitchen and foyer and then area rugs as appropriate down the road.

Laundry Room THEN:


Laundry Room NOW:


All I've managed to do is get new machines since the ones they left us were literally shrinking our clothes even though they were on the lowest possible dryer setting.  I've got plans.  Most of them start with putting a slab of counter over the top of the machines.  But that's just the beginning ;-)

Foyer THEN:


Foyer NOW:


You might say it hasn't changed much and it's just the foyer but I painted all those dang spindles myself!  And the army of doors that you can just partially see some of in the second picture - if you include the front door, we have FIVE doors marching in a row.  I swear I'm going to get cutesy signs to put on all of them one day.

* I really did start this on the 12th, the anniversary of the day we moved in but then I realized I didn't have any pictures that were even vaguely current.  So now it's 2 weeks later.  oops.

Oh and I seriously HATE the online blogger interface - I have no idea where all that space came from or how to get rid of it!

Thursday, March 22, 2012

household science experiments

or how Pinterest saved my bathroom sink.

Over the weekend I decided to try a few of the household cleaning tips I’d been seeing on Pinterest.  These are usually with the eye towards using less toxic chemicals in your house.

First is this one for removing soap scum:

Source: food.com via Marcy on Pinterest


The directions state that you heat 12oz vinegar and add 12oz of original Dawn for a 1:1 solution.

Ok, so on the first go round I forgot about the heating the vinegar part.  But I tried it overnight on my SUPER scummy bathroom sink – this sink had a steady drip for the first 5-6 months we lived here and looked like it had had the drip for years before we moved in so there was a distinct ring of hard water and scum that nothing was getting it off.  I sprayed it on one night and scrubbed with a stiff bristled brush in the morning and it seemed to be working but, oh my god, Dawn suds so much that it was taking forever to get the solution off.  So I added another cup of, heated this time, vinegar.  This seemed to help things.  I also used it on my tub and shower to great results.

I need to go one more round with my bathroom sink to get the final bits of super stubborn scum off but the results so far have been AMAZING.  I went from seriously considering replacing my sink at some point in the future to having a sink that looks almost brand new – of course, I have no pictures of this amazing transformation :(

I think the problem with the original “recipe” is that it assumes that you have original Dawn and not the super concentrated Dawn that is also readily available and looks just about the same if you’re not paying attention.  If you’ve got the super concentrated, I would recommend 2:1 vinegar to Dawn.  Maybe even 3:1.

Oh and a couple of the comments I’ve seen talk about how wonderful and clean everything smells… um, personally, original Dawn scent + vinegar smells hideous!  But it works so I’ll stick with it.

The second is homemade Drano:


The directions are 1/2 cup baking soda, 1 cup vinegar, and a gallon of boiling water.

Our shower has been running slow in the last few weeks and with Sweet Pea underfoot I wasn’t keen on buying Drano which was our go-to in Virginia.  I figured I would give it a try and if it works – yay!  If not, we’ll just lock up the Drano.

The original poster talked about needing something to force the suds back down the drain.  Since this was a flat shower drain, I just grabbed one of our rubber jar openers.  So armed with my supplies (baking soda, vinegar and the jar opener), I left our biggest pot on the stove to boil (I don’t actually know if it was a gallon or not) and went to begin.  Getting the baking soda down the drain was a bit of a challenge so I got as much of the 1/2 cup as I could, poured on the vinegar and slapped on the cover as quickly as I could.  Let me tell you – this part was FUN.  It just foams everywhere and that’s when I felt like I was doing science experiments at home.  Then repeat with the rest and let it sit until the water was boiling.  Getting a whole pot of water that was just at a rolling boil up the stairs and into the shower was a bit of a feat – one that I would never dream of doing without Will home to keep the baby out of my way – but it was accomplished. 

And we’ve had no problems since.  I assume we’ll have to do this periodically but it sure beats having Drano in the house and the ingredients are much cheaper than a “single serve” bottle of Drano.  Though I do want to know where one finds the bag of baking soda she shows in the picture above.

Update: My mom checked and you can get an 11lb (or was it 13lb) bag of Arm & Hammer in Sam’s for under $6.

Tuesday, March 13, 2012

nursery – dresser drawer saga

It’s an IKEA dresser so you know I couldn’t leave it just like it was supposed to be, right?  I wasn’t planning anything more major than lining the drawers and swapping out the knobs – I’ve seen some crazy awesome IKEA hacks on Apartment Therapy but nah…

I just went simple.  I lined the drawers and swapped out the knobs. 

Unfortunately, lining the drawers proved bizarrely complicated.  Or maybe I just made it overly complicated.  I don’t know.

The bottoms of the drawers are yellow and white stripes.  I think I’ve mentioned my distaste for yellow, right? So I bought 4 different scrapbook papers – 8 drawers, each paper for 2 drawers – to line them.  I decided that it would be easiest to do this before putting the drawers together so that I could just deal with the flat bottoms of the drawers rather than wholly made up drawers.
DSC_8463
DSC_8464
My materials – paper, drawer bottoms, DIY modpodge (I don’t recommend it or find better directions than the 50/50 mix of elmer’s and water that I was working with), and a foam brush.
DSC_8465
Apply glue with brush.  Stick paper on…
DSC_8466 DSC_8467
and watch your paper destroy itself :(
DSC_8468
Try the rolling pin… no dice.
DSC_8469
Try stacking a whole bunch of flat weight on top… no pictures but this didn’t work either.  Actually, that was a complete disaster.  It all stuck together.  No, actually, first it worked but the paper peeled right back off so then I tried to put the “modpodge” on the top surface too and that stuck to everything.
IMAG0373
Finally move on to Plan B – use spray mount to stick the paper down and then cover in clear contact paper.  That actually worked like a charm.  I lapped the contact paper over the edges since they would be hidden under the edges of the drawers once they were put together.  I figured that might add to the staying power and make for a more seamless look.
DSC_8524
Will put the the rest of the drawers together.
DSC_8526
With his little supervisor watching every move, of course ;-)
 DSC_8534
These are the smaller top drawers – the bigger bottom drawers are lined in the green polka dots you see above or pretty plain turquoise-y.

The dresser comes with dark, nearly black knobs which I didn’t think “went” with a pretty white dresser in a baby’s room.  So awhile back, I picked up some pretty pink glass knobs half off at Hobby Lobby.  I know I said that I was going gender neutral but that doesn’t mean that I can’t put in pops of girly that can be easily swapped out if the next munchkin turns out to be a boy.  I also convinced my mom to give me all the brushed nickel knobs that she got for her kitchen cabinets but had to replace since they were too shallow.  Score!

DSC_9765

Complete!

DSC_8537 
Bonus – you can almost tell that the walls are 2 different colors in this picture! But – oops!, I just realized that this picture is actually from before I swapped out the rest of the knobs.  D’oh!  Oh well, other things changed too so you’ll see later.

So that’s my very basic, simple IKEA hack on the Hemnes dresser.  Here’s the first part of the story.

Sunday, February 19, 2012

nursery – fill up the room

We have a room.

We scraped the ceiling free of its disgusting popcorn.

We painted everything.

Now we had to work on getting her moved in there which meant a little bit of furniture.  I wasn’t keen on putting her in there with just her crib. 

I had originally wanted to do one of those “find a dresser on craigslist and paint it” things.  Like from Domestic Adventure here.  But then I thought about my personal track record with painting drawers… ok, I’ve only done it once but, seriously, the darn thing gets stuck all the time.

So off to IKEA for the dresser that was partially the inspiration for our own custom made dresser – the Hemnes 8-drawer dresser in white.  And a chair and ottoman – we’re cheapish and just went with the Poang chair and ottoman.  I really wanted to like the Poang rocker but it costs a heck of a lot more than the standard Poang frame.  We went for the medium brown finish – it screams IKEA enough without being birch finish.

The dresser was by far the hardest piece of IKEA furniture that I have ever had the pleasure of helping to assemble and we have a lot of IKEA furniture in our house.  Here’s a few pictures:
DSC_8450 
Sort the pieces.
DSC_8452
Sort the bits.
DSC_8455
Which we cleverly, at least we thought, sorted into a breakfast tray.
DSC_8456
And begin.
DSC_8458
And more…
DSC_8460
And more…
DSC_8461
And nearly there without drawers.
DSC_8472
We actually moved it into her room without the drawers.  I was attempting to line the drawers with pretty paper and it was taking me way longer than I expected.  So we didn’t build the drawers for a few more days.

DSC_8471
There she is rolling around getting the lay of the land.  I actually had to take the crib apart and put it back together to move it from our room into hers.  I managed it pretty well by myself but I was afraid to put the mattress platform in without Will for fear that I would scratch the crib.  And I’m not sure why I only have a picture with the footstool in it and none with the chair.

Friday, February 10, 2012

a quick question

This question is mostly directed at my mom since she is my long distance (hopefully soon-to-be local) decorator.   Hi Mom!

It’s about our living room.

Here’s our living room:
DSC_8341
Over that rattan chair to the right of the picture (with a table and another rattan chair next to it out of the frame) is a big blank wall – I’m not sure why I don’t have a picture of it.  The picture you see on the wall is a framed picture of an actual London Underground map.  It’s the only picture on the walls at the moment.

We tried to make this work:

But it’s WAY too big…. like cover the whole wall plus 2 out of the 3 light switches.  Oops.  So it’s upstairs.  Will likes to wander into the front bedroom and study it.

Then I was thinking of doing this:


It’s maps of where you met (Maryland), where you got married (NJ), and where you honeymooned (NZ) but the more I thought about it, I don’t think it would take up enough wall space.  I still love the idea though.

So here’s my new idea. 
DSC_9741DSC_9744 
Now, these are just temporary for now (held up with binder clips and pushpins) since I would definitely get them framed properly if this is what we decide to do.  It’s DC Metro map and a NYC Subway map – also authentic like the London one.

What do you think?  Yay or nay?  Will it be too much if I get them both framed like the other one?